This is the complete walkthrough of the ProSchedule installation wizard. The wizard runs automatically the first time you open your site. It is eight steps. Step 3 is Use Case — that choice decides whether you install a SaaS marketplace, one organization, or a personal calendar.
For a visual overview of installing on shared hosting, you can also watch:
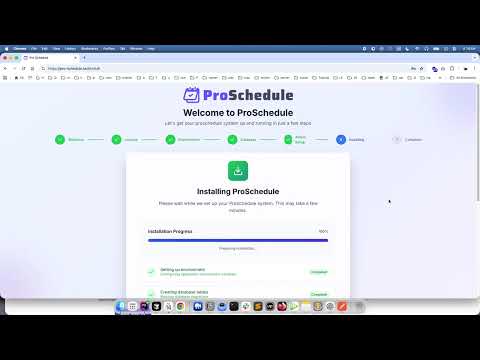
The video may show an older step order. Follow this page for the current wizard.
Before you start
1. Upload the files
Extract the CodeCanyon package. Upload the ProSchedule application folder to your server (not only the _documentation or _landing folders).
Point the site document root at the public/ directory:
| Server | Typical setting |
|---|---|
| Apache / cPanel | Document root = .../public |
| Nginx | root /var/www/proschedule/public; |
| Subdirectory | https://yourdomain.com/proschedule/public or a subdomain that already points at public/ |
Directory permissions 755, file permissions 644. These two paths must be writable:
storage/bootstrap/cache/
chmod -R 755 storage bootstrap/cache
2. Create an empty database
Create a MySQL database (PostgreSQL and SQLite are also supported). Note host, name, username, and password. The database user needs permission to create tables.
3. Have your license ready
Copy the CodeCanyon purchase code (Downloads → ProSchedule).
4. Pick an edition
You can change this later in Settings, but decide now so the installer seeds the right Home / FAQ / Contact copy:
| Use case | Choose this if | What the installer turns on |
|---|---|---|
| SaaS Platform | You resell scheduling, or run a marketplace of professionals | Workspaces, plans, Stripe billing, usage limits, public registration and pricing |
| Organization | One clinic, company, or practice with staff | Staff, organizations, contacts, notes. No SaaS billing. Registration off by default |
| Personal | One professional and their public booking page | Event types, calendar, appointments. No SaaS, staff, or CRM menus |
Appointment booking and client payments for visits work in all three editions.
The installer defaults to Organization if you do not change the selection.
Open https://yourdomain.com. The wizard starts automatically when the app is not installed.
Wizard steps at a glance
- Welcome & system check
- License verification
- Use case (SaaS Platform, Organization, or Personal)
- Environment
- Database
- Admin account
- Installing (migrations, seed, front pages, caches)
- Complete
Step 1: Welcome & system check
The first screen checks PHP version, required extensions, and directory permissions.
- Review any failed checks and fix them on the server.
- Click Get Started.
See System Requirements for the full list.
Step 2: License verification
- Paste your CodeCanyon purchase code.
- Click Verify License.
Find the code under CodeCanyon → Downloads → ProSchedule.
The domain you install on is bound to the license. Local development hosts are allowed for testing.
Step 3: Use case
This is the edition selector. Pick one card, then click Continue.
SaaS Platform
Best for agencies and multi-tenant products.
After install, ProSchedule enables:
- Workspaces, team roles, and invitations
- Subscription plans (Free, Starter, Professional, Enterprise)
- Stripe billing and usage limits
- Public
/pricing(when the Pricing module is on) - Public registration and a directory of professionals
- Organizations, contacts, notes, chat, blog, and FAQ
Your admin user also receives a default workspace named from your first name.
Organization
Best for one clinic, company, or practice. This is the installer default.
After install, ProSchedule enables:
- Staff users and roles
- Organizations, contacts, and notes
- Scheduling, event types, and public booking for the practice
- Optional chat, blog, and FAQ modules
It hides:
- Workspaces and the workspace switcher
- Subscription plans and usage limits
- The public
/pricingpage
Public registration is off. Event booking payments still work.
Personal
Best for one therapist, consultant, or other solo professional.
After install, ProSchedule enables:
- Event types, availability, and the calendar
- A public booking page at
/u/{your-username} - Appointment payments and calendar sync
It hides:
- Workspaces, plans, and
/pricing - Manage Users and roles
- Organizations, contacts, and notes
- Chat, blog, FAQ, and registration
The admin account is created with a public username and marked available, so /u/{username} works immediately.
Changing your mind later
You do not reinstall. Go to Dashboard → Settings → Global → Use Case.
- Switching hides menus and public pages. It does not delete users, workspaces, or Front Pages you already edited.
- Leaving SaaS is blocked while paid Stripe subscriptions are still active.
- Switching later does not overwrite customized Home / FAQ / Contact / Footer content.
Full behavior: Deployment Use Cases.
Step 4: Environment
Set application basics:
| Field | What to enter |
|---|---|
| Application name | Shown in the dashboard and emails. You can change this later in Settings. |
| Application URL | Full URL, for example https://yourdomain.com (no trailing path unless you installed in a subdirectory) |
| Environment | Use Production on a live site |
| Debug mode | Leave off on a live site |
Click Save & Continue.
Step 5: Database
- Choose MySQL (typical), PostgreSQL, or SQLite.
- Enter host, port, database name, username, and password.
- Click Test Connection, then continue.
Create an empty database first. The user needs permission to create tables.
Typical MySQL values: host localhost, port 3306.
Step 6: Admin account
Create the first administrator:
- First name and last name
- Email (this is the login)
- Password (at least 8 characters)
This user is an Administrator, email-verified, and available for public booking (needed for Personal mode).
Step 7: Installing
Do not close the browser. The installer now:
- Runs database migrations (creates tables if this is a fresh database)
- Seeds roles, settings, professions, email templates, and other core data
- Creates your admin user
- Saves the use case you chose in step 3 (
deployment_mode) - Seeds Home, FAQ, Contact, and Footer copy for that use case
- Creates a default workspace only if you chose SaaS Platform
- Marks the app installed (
APP_INSTALLED=true) - Caches config, routes, and views
If something fails, read the error on the screen, fix it, and retry. Common causes are database permissions, missing PHP extensions, or storage/ not writable.
Step 8: Complete
You should see Installation Complete.
- Open the homepage or the admin dashboard.
- Sign in with the admin email and password from step 6.
- Confirm the menus match the edition you chose.
First checks by edition
SaaS Platform
- You should see Workspaces and Subscription Plans.
- Open
/appointment— it is a directory of professionals (empty until you add users and mark them available). - Configure Stripe under Settings if you will sell plans.
Organization
- Workspaces and Subscription Plans should be hidden.
- Organizations, Contacts, Notes, and Users should be available.
/appointmentlists staff in this practice.- Registration is off until you enable it in Settings.
Personal
- Workspaces, Users, Organizations, Contacts, Notes, Chat, Blog, and FAQ should be hidden.
- Create event types, then share
/u/{your-username}. /appointmentredirects to that personal booking page.
Then continue with Post-installation and Settings.
Optional: demo data (demo sites only)
A new customer install does not load sample appointments. That is intentional.
To fill a dedicated demo database with named sample data:
php artisan command:import_demo saas
php artisan command:import_demo organization
php artisan command:import_demo personal
If you omit the mode, the command uses the installed use case.
| Mode | What you get | Demo logins |
|---|---|---|
saas |
Marketplace of professionals; named guests, CRM, blog, and chat for the three demo hosts | ahmad.khan@mail.com (doctor), zubair.shafi@mail.com (stylist), junaid.abbasi@mail.com (dentist) |
organization |
Clark Street Clinic, three doctors, patients, notes, clinic blog and chat | ahmad.khan@mail.com, omar.farooq@mail.com, yusuf.siddiqi@mail.com |
personal |
Faisal Malik Counseling, therapy clients and sessions | faisal.malik@mail.com |
Demo password (import only): Password@secret.com. The demo login page also has one-click role buttons.
Warning: import_demo truncates users and reseeds. Never run it on a database with real customers.
For named public brands on a demo host, set in .env:
APP_DEMO=true
APP_DEBUG=false
DEMO_USE_CASE=
Leave DEMO_USE_CASE empty. The import writes the edition into the database.
Official live demos:
Troubleshooting
Wrong menus after install
Confirm the Use Case in Settings → Global. Then:
php artisan cache:clear
php artisan config:clear
Hard-refresh the browser.
Personal booking page 404
The admin must have a username and be marked available. The installer sets both. Create at least one active event type.
SaaS menus still visible in Organization or Personal
Clear caches as above. If you still have paid Stripe subscriptions, you cannot leave SaaS until they are canceled.
Database or permission errors in step 7
- Confirm the database is empty and the user can create tables.
chmod -R 755 storage bootstrap/cache
More help: Troubleshooting.
Related documentation:
- Installation overview
- System requirements
- Post-installation
- Deployment use cases
- Settings
← All ProSchedule – Online Appointment Booking Software for Service Businesses documentation