Welcome to the ProMediClinic installation guide. This document provides a detailed walkthrough of the installation wizard. The installer is designed to be intuitive and user-friendly, with real-time validation and progress tracking to make setup smooth.
For a visual guide, you can also watch a shared-hosting installation tutorial.
🎯 Installation Overview
The ProMediClinic installation process consists of 8 comprehensive steps, each designed to configure a different part of the application:
- Welcome & System Check - Initial setup and requirements validation
- License Verification - Purchase code validation and activation
- Database Configuration - Database setup and connection testing
- Environment Setup - Application configuration and settings
- Database Migration - Schema creation and data structure setup
- Data Seeding - Initial data population and default settings
- Finalization - Application optimization and cache generation
- Completion - Installation success and next steps
🎬 Video Tutorial
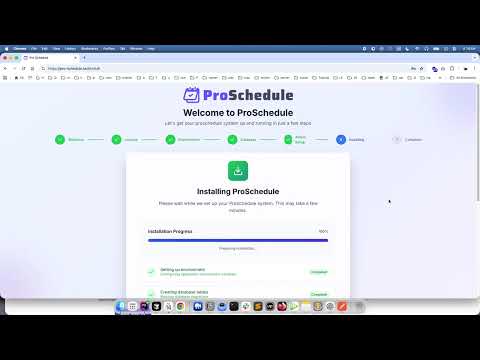
For a visual guide on how to install the app on shared hosting, watch the tutorial:
🚀 Step-by-Step Installation
Step 1: Welcome & System Check
[Placeholder: Welcome screen screenshot]
What happens:
- System requirements validation
- PHP extensions check
- Directory permissions verification
- Server configuration analysis
What you need to do:
- Review the welcome screen and system information
- Click "Get Started" to begin the installation
- Wait for the system check to complete
Expected results:
- ✅ All system requirements met
- ✅ PHP extensions loaded
- ✅ Directory permissions correct
- ✅ Server configuration valid
Step 2: License Verification
[Placeholder: License verification screen screenshot]
What happens:
- Purchase code validation
- License activation with remote server
- Domain verification
- License benefits display
What you need to do:
- Enter your CodeCanyon purchase code
- Review license benefits and terms
- Click "Verify License" to proceed
Expected results:
- ✅ Purchase code valid
- ✅ License activated successfully
- ✅ Domain registered
- ✅ License verification completed
Purchase Code Format:
Example: 12345678-1234-1234-1234-123456789012
Finding Your Purchase Code:
- Log into your CodeCanyon account
- Go to "Downloads" section
- Find ProMediClinic in your downloads
- Copy the purchase code
Step 3: Database Configuration
[Placeholder: Database configuration screen screenshot]
What happens:
- Database connection testing
- Database type selection
- Connection parameters validation
- Database accessibility verification
What you need to do:
- Select your database type (MySQL, PostgreSQL, or SQLite)
- Enter database connection details:
- Host: Database server address (usually
localhost) - Port: Database port (3306 for MySQL, 5432 for PostgreSQL)
- Database Name: Your database name
- Username: Database username
- Password: Database password
- Host: Database server address (usually
- Click "Test Connection" to verify
Expected results:
- ✅ Database connection successful
- ✅ Database accessible
- ✅ Credentials valid
- ✅ Ready for schema creation
Database Setup Tips:
- Create an empty database before installation
- Ensure the database user has full privileges
- Use strong passwords for security
- For shared hosting, use provided database credentials
Step 4: Environment Setup
[Placeholder: Environment setup screen screenshot]
What happens:
- Application configuration
- Environment variables setup
- Mail configuration
- Security settings
What you need to do:
-
Basic Settings:
- Application Name: Your business/app name
- Application URL: Your website URL
- Environment: Production, Staging, or Local
- Debug Mode: Enable only for development
-
Mail Configuration (Optional):
- SMTP Host: Your email server
- SMTP Port: Email server port (usually 587)
- Username: Email username
- Password: Email password
-
Click "Save & Continue" to proceed
Expected results:
- ✅ Environment configuration saved
- ✅ Application settings configured
- ✅ Mail settings configured (if provided)
- ✅ Security settings applied
Step 5: Database Migration
[Placeholder: Database migration screen screenshot]
What happens:
- Database schema creation
- Table structure setup
- Index creation
- Foreign key constraints
What you need to do:
- Review the migration summary
- Click "Run Migration" to create database structure
- Wait for migration to complete
Expected results:
- ✅ Database tables created
- ✅ Indexes and constraints applied
- ✅ Schema structure complete
- ✅ Database ready for data
Migration Details:
- Creates 40+ database tables
- Sets up relationships and constraints
- Configures indexes for performance
- Establishes data integrity rules
Step 6: Data Seeding
[Placeholder: Data seeding screen screenshot]
What happens:
- Default data insertion
- Initial settings configuration
- Sample data creation
- System initialization
What you need to do:
- Review the seeding summary
- Click "Run Seeding" to populate initial data
- Wait for seeding to complete
Expected results:
- ✅ Default settings created
- ✅ Initial data populated
- ✅ System initialized
- ✅ Ready for finalization
Seeding Includes:
- Default user roles and permissions
- Initial application settings
- Sample event types and categories
- Default email templates
- System configuration data
Step 7: Finalization
[Placeholder: Finalization screen screenshot]
What happens:
- Application key generation
- Cache optimization
- Route caching
- Configuration optimization
- Storage linking
What you need to do:
- Review the finalization summary
- Click "Finalize Installation" to complete setup
- Wait for optimization to complete
Expected results:
- ✅ Application key generated
- ✅ Caches optimized
- ✅ Routes cached
- ✅ Configuration optimized
- ✅ Storage linked
Optimization Details:
- Generates secure application key
- Creates optimized caches
- Caches routes for performance
- Optimizes configuration files
- Links storage directories
Step 8: Completion
[Placeholder: Installation complete screen screenshot]
What happens:
- Installation success confirmation
- Next steps guidance
- Admin access information
- Support resources
What you need to do:
- Review the completion summary
- Note your admin login credentials
- Click "Visit Homepage" or "Admin Dashboard"
- Start using ProMediClinic.
Expected results:
- ✅ Installation completed successfully
- ✅ Application ready for use
- ✅ Admin access configured
- ✅ Core dashboard access available
🔧 Installation Features
Real-Time Progress Tracking
- Progress Bar: Visual progress indicator
- Step Validation: Each step validated before proceeding
- Error Handling: Clear error messages and solutions
- Rollback Capability: Automatic rollback on failure
Security Features
- License Validation: Secure purchase code verification
- Code Integrity: Automatic integrity checks
- Secure Configuration: Encrypted configuration storage
- Access Control: Proper permission setup
User Experience
- Modern Interface: Beautiful, responsive design
- Clear Instructions: Step-by-step guidance
- Helpful Tips: Contextual help and suggestions
- Mobile Friendly: Works on all devices
🚨 Troubleshooting
Common Issues
License Verification Failed:
- Verify purchase code format
- Check internet connection
- Ensure domain is accessible
- Contact support if issues persist
Database Connection Failed:
- Verify database credentials
- Check database server status
- Ensure database exists
- Verify user permissions
Permission Errors:
- Set proper file permissions
- Check directory ownership
- Verify web server access
- Contact hosting provider
Migration Errors:
- Check database permissions
- Verify database space
- Review error logs
- Try manual migration
Getting Help
- Check Logs: Review installation logs for specific errors
- Contact Support: Reach out to our support team
- Community Forums: Ask questions in our community
- Documentation: Review troubleshooting guides
📚 Next Steps
After successful installation:
- Login to Admin Dashboard: Use provided credentials
- Configure Settings: Set up your application preferences
- Create Event Types: Define your service types
- Set Up Schedules: Configure your availability
- Customize Frontend: Personalize your booking pages
- Invite Users: Add team members and clients
Related Documentation: